Getting Started With Coupon Carrier and Brevo (Sendinblue)
Coupon Carrier allows you to send unique discount codes or coupons to your Brevo subscribers. This guide will show how to send a unique code to each contact that's added to a list.
Here's an overview of the steps we're going to cover in this guide:
- Create a new Brevo Automation.
- Add a "Call a Webhook" action that sends a notification to Coupon Carrier.
- Wait for the code to be assigned to the contact. We don't want to send out the email until we know that the code has been assigned.
- Send an email with the unique code included.
Send a unique code to each contact that is added to a list
-
If you already have a list of unique codes that you want to distribute to your subscribers, you can Import your codes to a code list. If you're using an e-commerce platform that we support, you can choose to have your codes automatically generated. In this example, we'll create a new code list and add a few unique codes.

-
On the main Configurations tab, create a new Code Email configuration and connect it to your Brevo account.

-
We're going to deliver the mail using a Brevo Automation, so let's choose this option.

-
Next, select which Code list you want to use as the source for your codes. Here we'll choose the one that we created in the first step.

-
Before we switch over to Brevo, save and activate the configuration. Only active configurations will trigger new codes to be added.

-
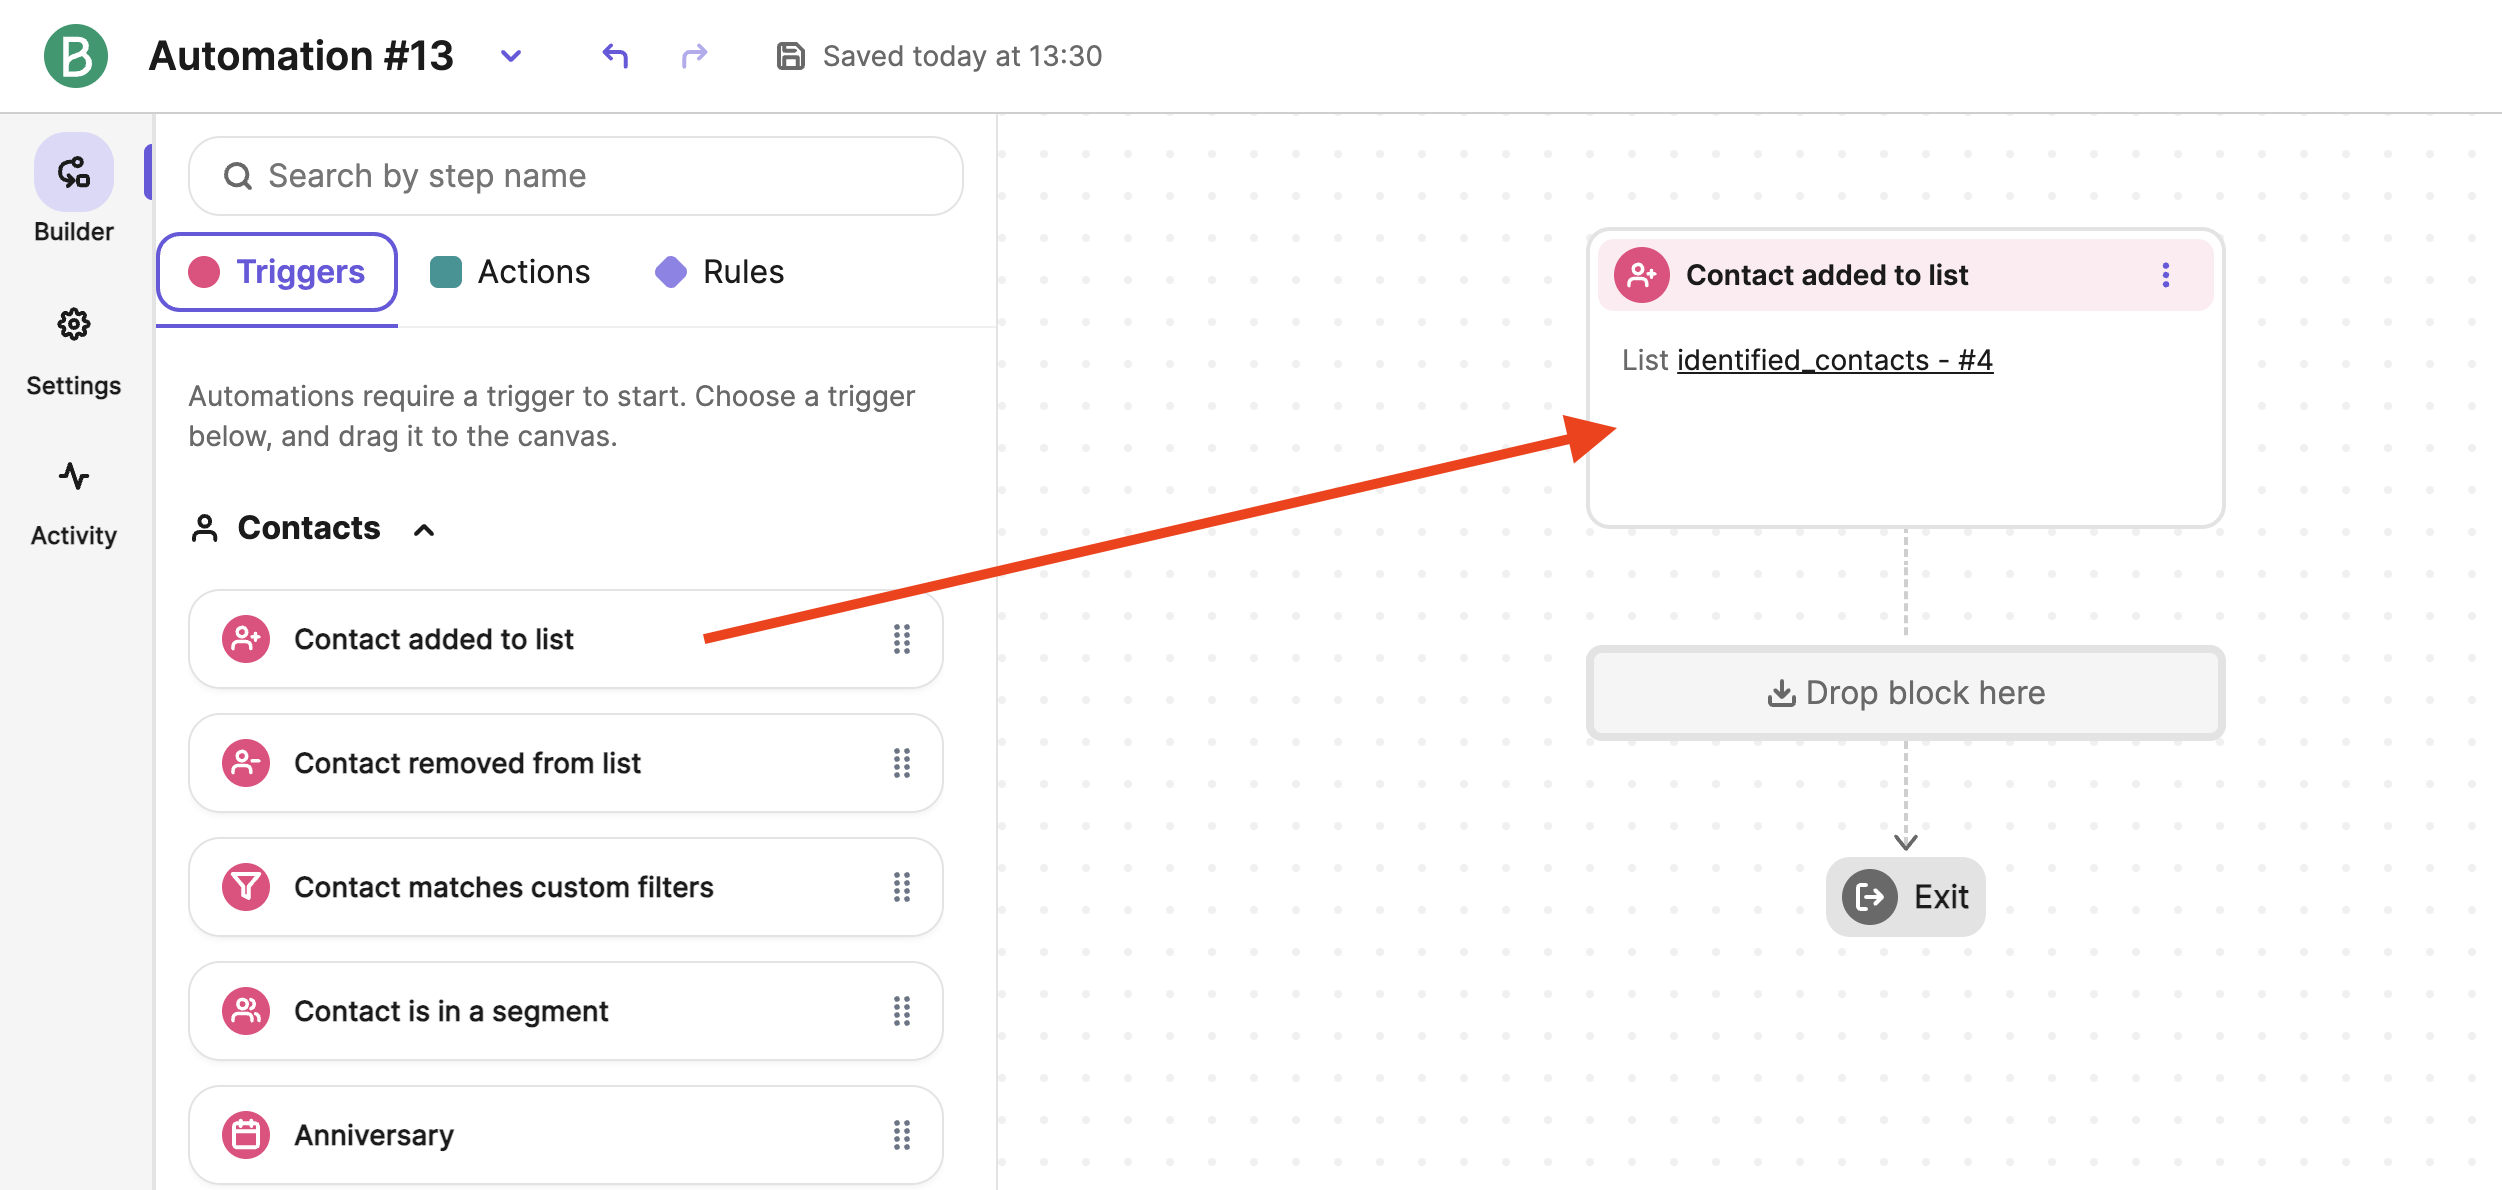
Switch over to your Brevo account and create a new Automation. Select "Create from scratch". Next, add a start trigger to the automation by dragging "Contact added to list" and dropping it at the start of the automation.
-
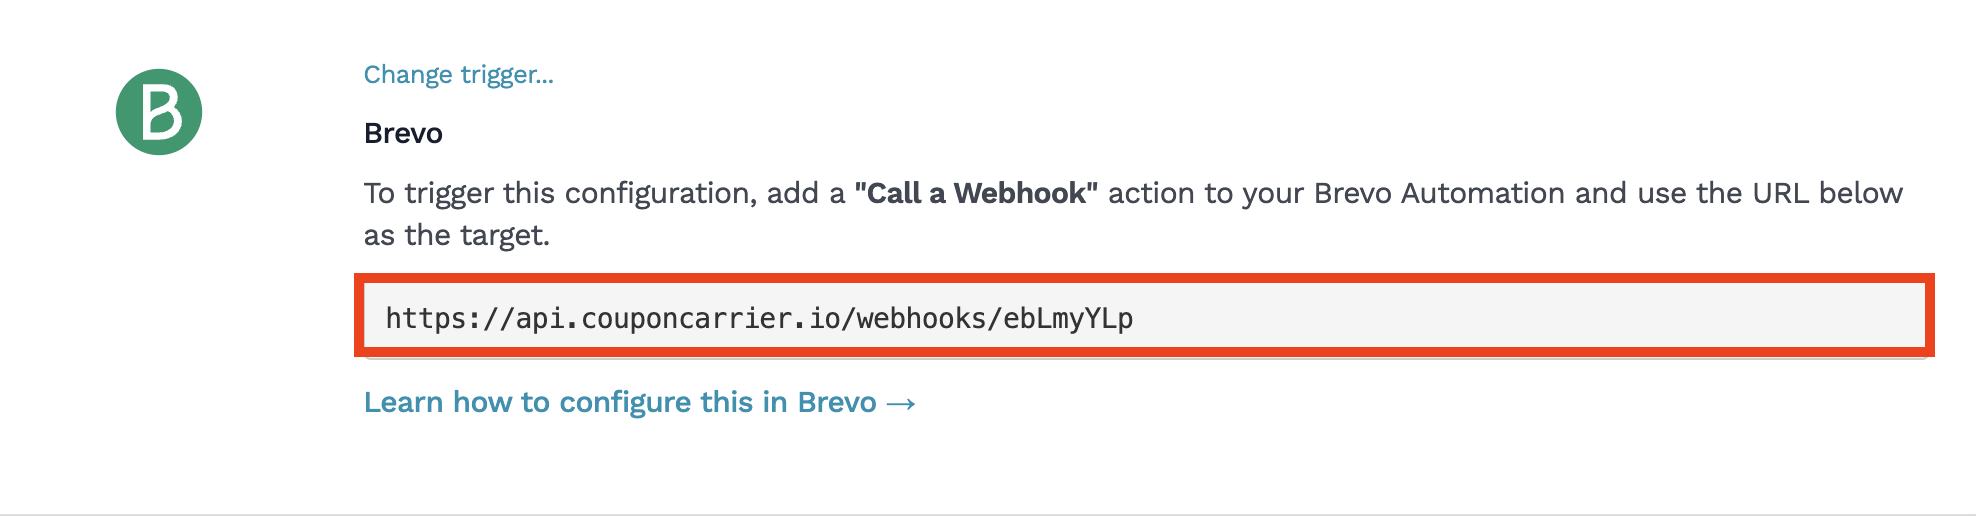
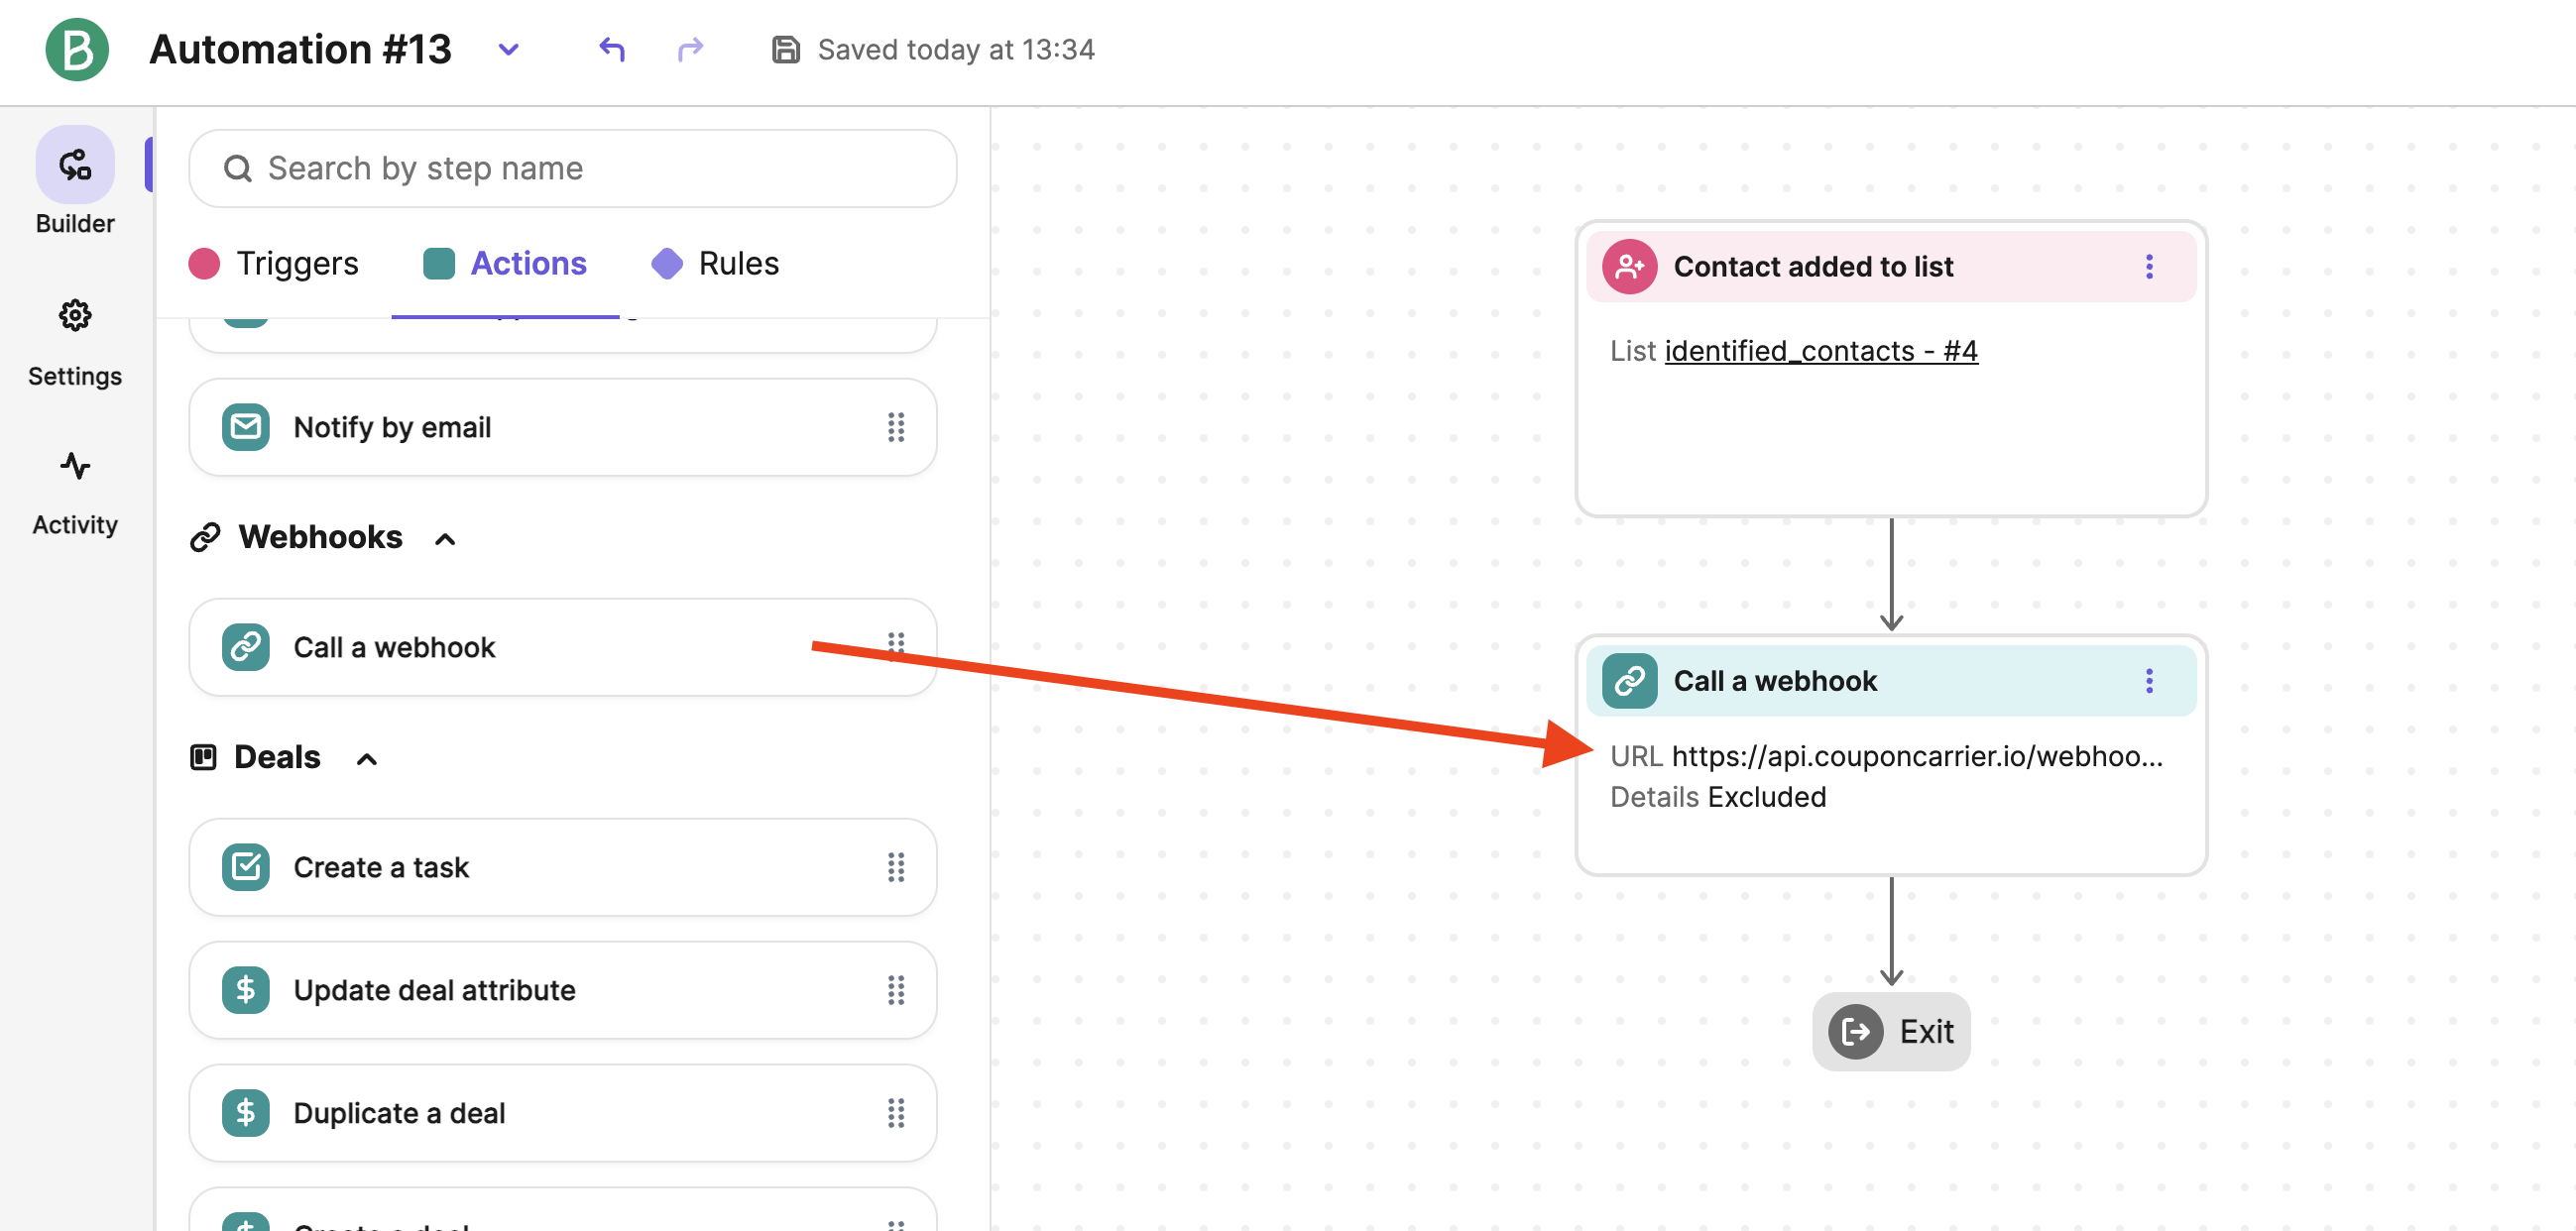
Immediately after a contact starts this automation, we're going to send a notification to Coupon Carrier. Add a "Call a Webhook" action and use the URL from your newly created Code Email in Coupon Carrier. When sent, Coupon Carrier will add an event to the contact that contains the unique code.
-
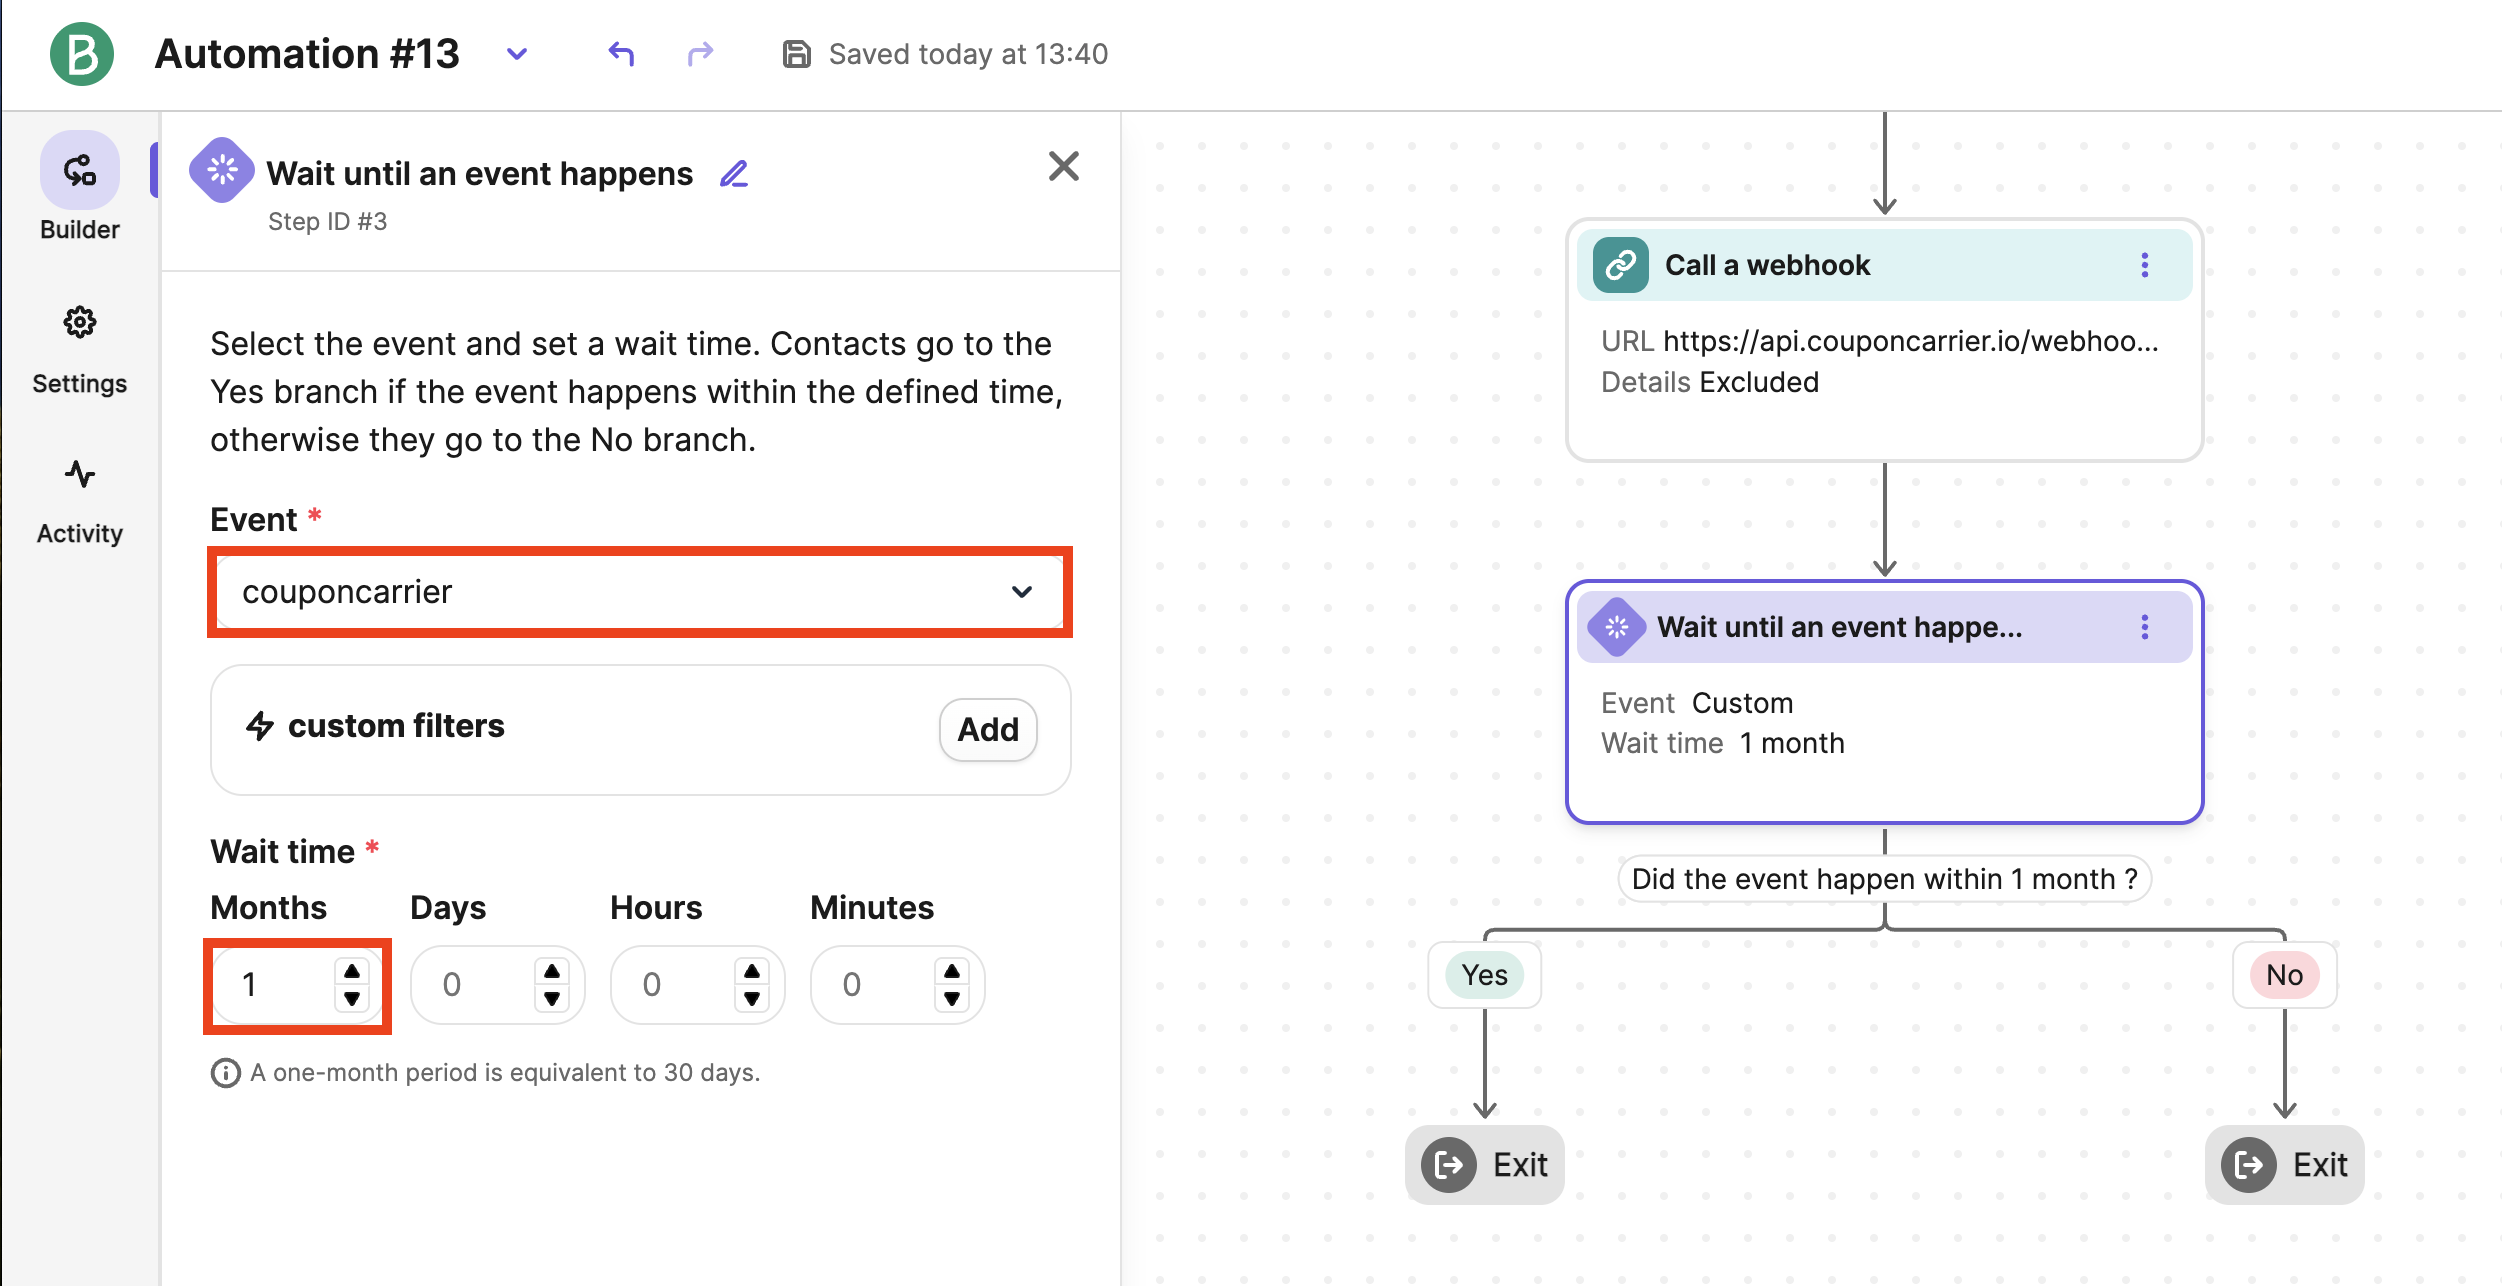
To ensure a code is assigned before sending the email, add a "Wait until an event happens" rule and choose "couponcarrier" as the event to track. You can find it in the "Custom" events folder. You also need to specify how long this rule should wait before continuing. You should set this to 1 month to ensure no email is sent until the code is added.
-
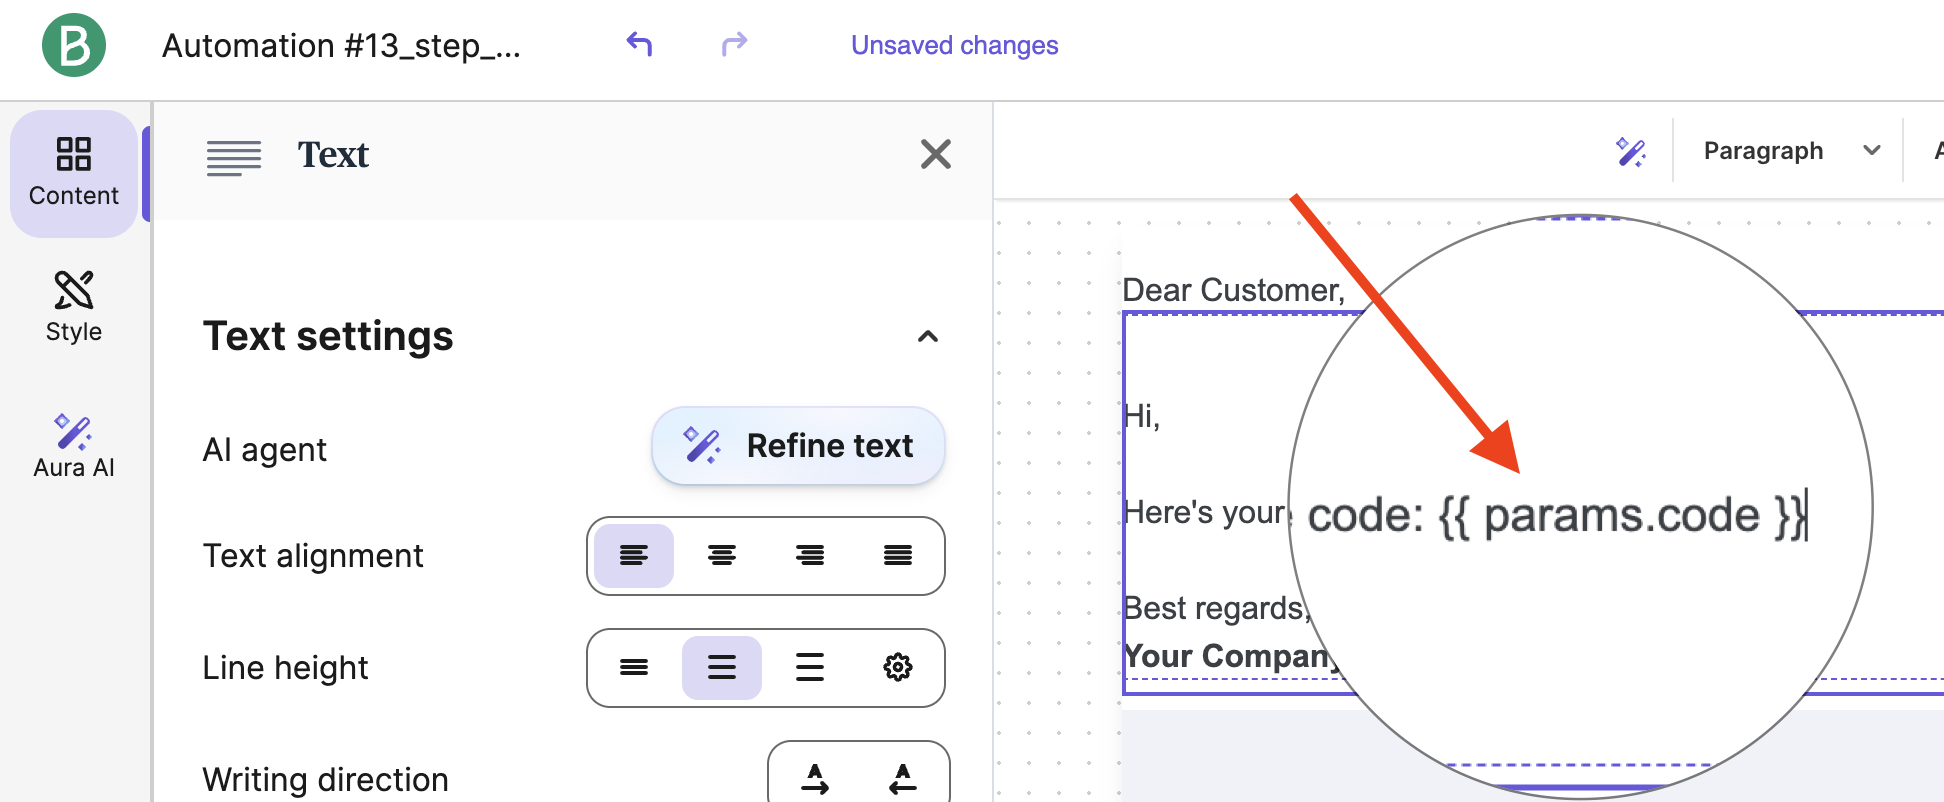
Add a "Send an email" action and ensure that you select the option to show event data in the email by selecting "Last instance of an event" and choosing the event "couponcarrier" from the custom folder again. This allows you to access the event with the unique code. Edit the email template and add {{ params.code }} to the place where you want the code to be shown.
-
And we're done! Save and activate the automation, and then you can test it by manually adding a new contact to your email list. If you need help or have questions, contact us using the help feature at the lower right when you're signed in to your Coupon Carrier account.


